Visual Testing (VT): The First Line of Defense in Non-Destructive Testing
Another type of test, one of the most basic and often the initial method of non-destructive testing (NDT), is visual testing (VT) or visual inspection. It is a simple inspection method based on visual observation, used to evaluate the surface state of a part. What is so important about VT? There is no other tool that can be compared to it when it comes to early defect detection. It enables quality control inspectors to detect possible problems before they become severe, and this becomes an important element of quality control in various fields.

What is Visual Testing (VT)?
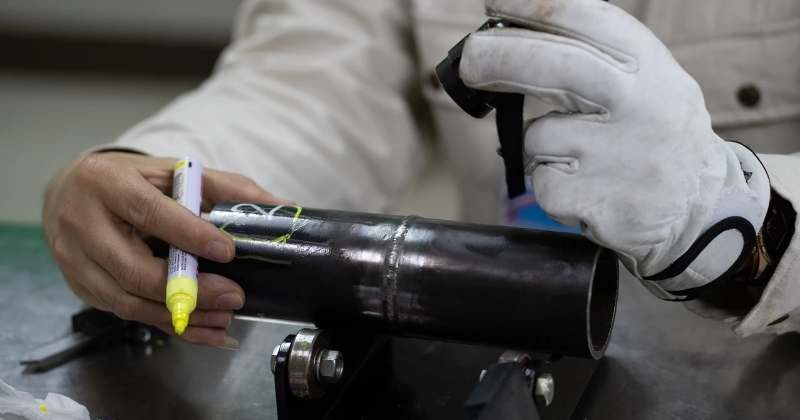
Visual Testing (VT) consists of examining, using the human eye (as aided or not), components, structures, or systems. Numerous people know that it is the most frequently used and inexpensive NDT technique. Identification of surface-level flaws is the primary objective of VT, with cracks, corrosion, deformation, and discontinuity, as well as other surface blemishes. It can be the straightforward process of human eye defect inspection of the visible imperfections or the complex partitioning of more in-depth examination of the surface faults by means of superior technology. VT offers critical information regarding external integrity regardless of whether it is through direct visualization or remote visualization.
How Visual Testing Works
Visual Testing can be carried out by manual and assisted inspection, as the method is suitable for both accessibility and the complexity of the component.
During the direct visual inspection, a competent inspector actually applies his/her naked eye, or simple equipment as magnifiers and mirrors, to check the surface. This will need a good inspection light and direct visual access to the site.
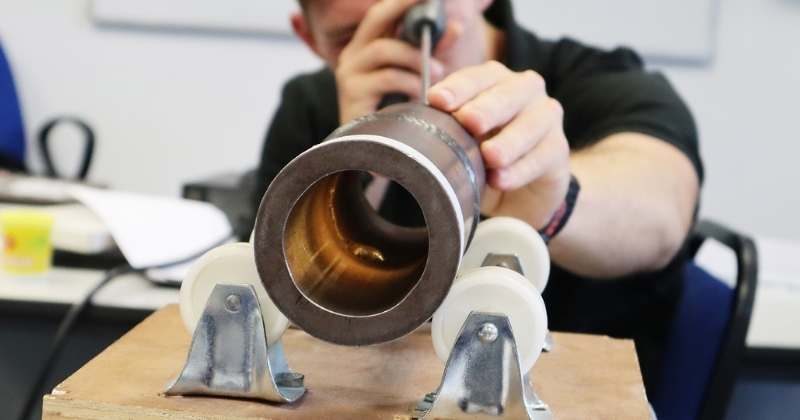
The aided visual examination is applied in difficult or impossible areas to access. These are complex devices that include borescopes, videoscopes, fiber optic cameras, and even robotized systems with mounted cameras. Drones with high-resolution cameras are great to use as remote VT equipment in large or dangerous surroundings. The right documentation requirements must be there in collating findings, irrespective of the method.
Types of Visual Testing
Visual Testing broadly categorizes into two main types:
- Direct Visual Testing: This is when the inspector visually checks using his ears without using any equipment, being at a close distance. The examination can be augmented by basic visual assessment tools such as magnifying glasses, rulers, and gauges.
- Indirect (Remote) Visual Testing (RVI): Where direct access is inconvenient or risky, specialised equipment is used by the inspectors. These include flexible and rigid borescopes, videoscopes, and camera-based investigation systems, such as endoscopic testing, for use in internal spaces. Even highly sophisticated RVI (remote visual inspection) devices may include remotely operated vehicles (ROVs) or drones as part of inspections on the large structures.
Applications of VT in Industries
Visual Testing is a procedure that is widely practiced in a range of industries, and it proves to be the first line of inspection for a substantial group of assets:
- Aerospace: Critical to routine aircraft visual checks of structures, engine components, landing gear, and welds to check fatigue cracks, corrosion, and foreign object debris.
- Oil & Gas: Vital in ensuring the condition of tree inspection of pipelines, pressure vessels, storage tanks, and structural components by checking Corrosion surveillance, weld examination, and overall material degradation. VT forms the basis of vessel inspection.
- Marine: This application is widely used to scan underneath the ship hulls and the decks, platforms offshore, and inside the tanks to look for the presence of corrosion, structural defects, and perform weld inspection.
- Construction: Used on steel structures, bridges, and concrete components to check the integrity of welds and to generally test structural integrity and surface flaws.
Advantages of Visual Testing
Visual Testing in general provides attractive advantages that indicate the necessity of its usage as one of the essential NDT techniques:
- Quick and Efficient: VT is usually a low-cost NDT mechanism, and it takes a little setup and also provides you with instantaneous results. This renders it suitable for first-line inspection and quick screening.
- No Special Equipment Required (in basic form): In basic form, no special equipment is required to carry out many routine visual quality assurances, and as such, it is extremely accessible.
- Real-time Feedback: Inspectors are usually capable of detecting problems as they happen in real-time, assuring early fault detection and enabling the timely decision or continued inspections using other NDTs.

Limitations of VT
Even though Visual Testing is popular, it still has its limitations:
- Surface Only Flaw Detection: VT is mostly surface-only flaw detection. It is unable to find interior or underground imperfections that do not show on the surface.
- Lighting and Dependent on Inspector Skill: VT is highly dependent on the use of adequate lighting as well as the skill of the inspector and his or her eyesight. Human error is a risk that can be augmented by poor inspection lighting or harsh conditions in the environment, which reduces its effectiveness.
- Not Effective in Internal or Subsurface Defect: VT is a surface method, so there is no way it can help to detect subsurface and internal defects. It has a visual scope limitation, which is why it should be combined with other NDT techniques to evaluate properly inside.
Visual Testing Standards and Certifications
Visual Testing is a stable and dependable process that necessitates the observance of stipulated criteria of NDT and also the availability of skilled personnel. Standards of importance are:
- ISO 17637: This international standard lays out the provisions on visual inspections of Fusion-welded joints.
- ASME Boiler and Pressure Vessel Code (BPVC) Section V: This specifies the procedure/requirements of nondestructive examination means, such as VT, to be employed during the manufacture and examination of pressure vessels and boilers.
The role of certified VT inspectors cannot be exaggerated. The technical members usually have Level I certification or Level II certification, which is evidence of their qualification as inspectors, as well as having met industry compliance, and they would be able to interpret and scan VT tests correctly.
Why Choose SNDT for Visual Testing
By selecting SNDT to provide your Visual Testing services, you can count on longtime NDT professionals. Our comprehensive solutions on SNDT make use of a high level of visual inspection and company experience. We hire fully certified VT inspectors with expertise in both direct and distant visual inspection procedures. We carry high-quality remote VT equipment as well as powerful inspection lights in order to provide detailed and correct results. Our excellent commitment to NDT is manifested in the aerospace, oil and gas, marine, and construction industries, where we offer quick reports and upright structural integrity.
Conclusion:
Visual Testing (VT) is also a very important and basic measure of an excellent quality control program. The fact that it gives an instant visual check of the flaws makes it a first layer of protection against the possible failure of the components. Through a proactive, preventative inspection, the companies can detect the problems beforehand, thus minimising the risk and maintaining the required safety and regulatory integrity.
Do not underestimate the effectiveness of visual evaluation. Order VT NDT service today. To book your visual checkup, you have to contact SNDT and protect your property.
Frequently Asked Questions (FAQ) Visual Testing (VT)
1. What errors can be discovered by Visual Testing (VT)?
Answer: VT mostly identifies the surface defects, which include: cracks, corrosion, deformation, surface discontinuities (e.g., pits, dents, scratches), misalignment, weld defects (e.g., undercut, porosity), and overall material deterioration.
2. Which tools are applied in Visual Testing?
Answer: Other things that would be used other than the naked eye are: magnifiers, mirrors, gauges, micrometers, and measuring tapes. In the case of remote visual inspection, special equipment is employed: borescopes, videoscopes, fiber optic cameras, and even drones.
3. Is inspection provided just by use of Visual Testing ( VT )?
Answer: Although VT is an important initial-line approach to inspect surface flaws, it usually may not be adequate, by itself, on critical parts. It is commonly applied to screen for expeditiously apparent defects and is normally followed up by other more refined methods of NDT (such as Ultrasonic Testing or Radiographic Testing), which can map defects internally or beneath the surface.
